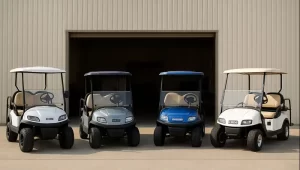
Painting a golf cart is one of the most effective ways to transform its appearance and increase its resale value. A faded or scratched body can make an otherwise great cart look worn out, but a fresh coat of paint can instantly modernize it and make buyers take notice.
Whether you’re restoring an older cart or planning to flip one for profit, understanding how to paint a golf cart properly makes a huge difference in the final result. From surface preparation and primer selection to choosing the right paint brand and application method, every step matters.
In this guide, we’ll cover:
- Proper prep work before painting
- How to choose the best paint for golf carts
- Spray cans vs spray guns
- Recommended paint brands
- Clear coat and finishing tips
- How much painting can increase resale value
We’ll also mention when it makes sense to hire professionals for a showroom-quality finish.
Why Painting a Golf Cart Can Be Worth It
Many golf carts spend years outdoors in sun, rain, and dust. Over time, the factory paint fades, scratches, or becomes dull.
A new paint job offers several benefits:
- Improves overall appearance
- Protects the body from further wear
- Makes older carts look newer
- Helps the cart sell faster
- Increases resale value
For people restoring or flipping golf carts, paint is often one of the highest ROI upgrades you can make.
Even a DIY job can dramatically improve curb appeal if done correctly.
How Much a New Paint Job Can Increase Golf Cart Resale Value
The exact increase depends on the cart’s condition, brand, and overall upgrades, but repainting often adds noticeable value.
Typical resale impact:
| Condition Before | Condition After | Potential Value Increase |
|---|---|---|
| Faded plastic body | Clean solid-color repaint | $300–$700 |
| Scratched panels | Full repaint + clear coat | $500–$1,000 |
| Custom paint/graphics | Professionally finished cart | $1,000+ |
For carts being flipped or resold locally, buyers often judge them heavily on appearance. A clean paint job signals that the cart has been well cared for.
For those wanting a showroom-level finish, many owners choose professional services like custom golf cart builds and upgrades offered from Resort Life Carts.
1: Remove Parts Before Painting
Proper prep starts with disassembly.
Remove components such as:
- Roof supports
- Windshield
- Trim pieces
- Light kits
- Seat backs
- Decals or badges
This allows paint to reach every surface and prevents overspray.
Masking everything instead of removing parts can work, but it usually leads to less professional results.
2: Thoroughly Clean the Golf Cart Body
Before sanding or priming, remove all dirt, wax, and grease.
Recommended cleaning process:
- Wash with soap and water
- Scrub with a Scotch-Brite pad
- Rinse thoroughly
- Wipe down with isopropyl alcohol or degreaser
- Finish with a tack cloth
Any residue left behind can cause paint adhesion issues.
3: Sand the Surface Properly
Golf cart bodies are typically made of plastic or fiberglass, which means sanding is essential for paint to stick.
Recommended sanding approach:
- 320–400 grit for general scuffing
- 220 grit for deeper scratches
- 600 grit before paint if aiming for smoother finish
The goal isn’t to remove all paint—it’s to create a slightly rough surface that primer can bond to.
Focus on:
- Scratches
- Scuffs
- Dull areas
After sanding, wipe the surface clean again.
4: Repair Scratches or Damage
If the cart has deeper scratches or gouges, fix them before priming.
Common repair options include:
- Plastic filler
- Automotive glazing putty
- Lightweight body filler
Once repairs cure, sand them smooth so the body panels look uniform.
Skipping this step often results in visible imperfections after painting.
5: Apply a Bonding Primer
Primer helps paint stick to plastic surfaces and improves durability.
Good primer options include:
- Rust-Oleum Automotive Primer
- Dupli-Color Adhesion Promoter
- SEM Plastic Adhesion Promoter
Apply:
- 2–3 light coats
- 5–10 minutes between coats
Let the primer cure fully before applying color.
Light sanding with 600 grit after primer can help produce a smoother final finish.
6: Choosing the Right Paint for Golf Carts
Golf carts can be painted with several different paint types.
Spray Paint (Rattle Cans)
Pros:
- Easy for beginners
- No equipment required
- Inexpensive
Cons:
- Harder to get even coverage
- More coats required
Spray Gun / HVLP
Pros:
- Smoother finish
- More professional look
- Better coverage
Cons:
- Requires equipment
- Learning curve
Many DIY restorers start with spray cans and upgrade to spray guns as they gain experience.
Recommended Golf Cart Paint Brands
Several brands consistently produce good results for DIY golf cart projects.
Rust-Oleum Automotive
- Popular for DIY restorations
- Affordable and easy to find
- Metallic options available
Dupli-Color
- Designed for automotive plastics
- Good adhesion and durability
SEM Color Coat
- Professional-grade finish
- Excellent for plastic panels
Krylon Fusion
- Specifically designed for plastic surfaces
Rust-Oleum metallic colors, like cobalt blue or graphite, are commonly used because they provide strong coverage and good durability.
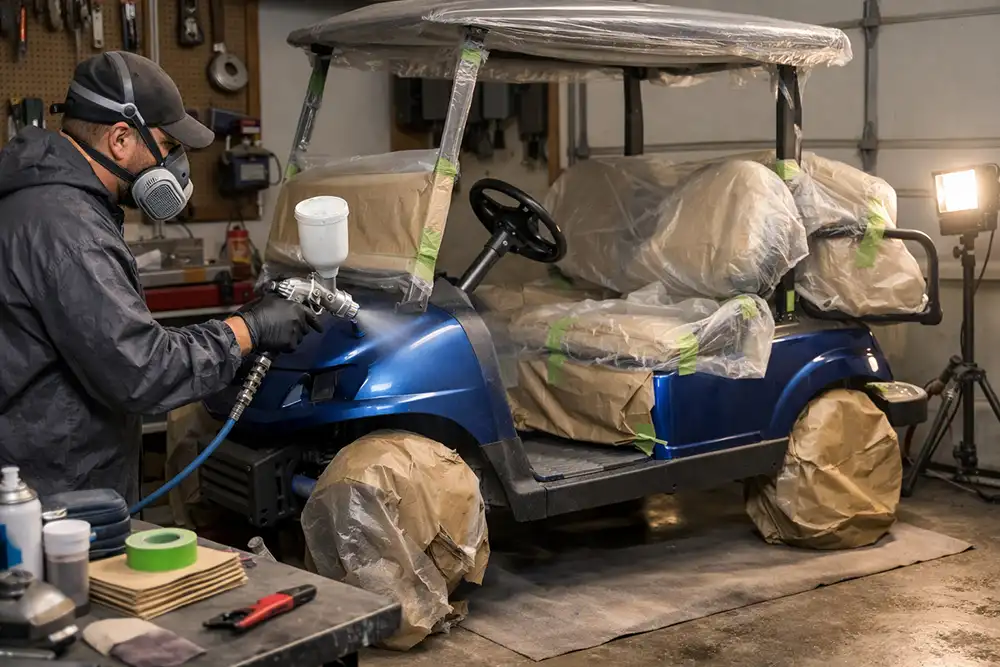
7: Applying the Color Coat
This is where patience matters.
General painting guidelines:
- Apply thin coats
- Hold spray 8–12 inches away
- Use smooth sweeping motions
- Overlap each pass slightly
Typical process:
- Light tack coat
- 2–3 medium coats
- 10–15 minutes between coats
Avoid heavy coats—they cause drips and uneven finishes.
8: Apply a Clear Coat for Protection
Clear coat adds gloss and protects the paint from scratches and UV damage.
Benefits of clear coat:
- Deeper shine
- Better durability
- Easier cleaning
Apply:
- 2–3 coats
- 10–15 minutes apart
Let the cart cure for 24–48 hours before reassembly.
9: Reassemble the Cart
Once the paint is fully cured:
- Remove masking tape
- Reinstall trim and accessories
- Reattach roof and windshield
Take your time here to avoid scratching the new paint.
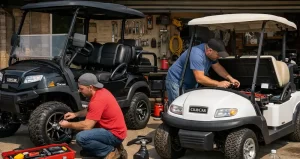
When Professional Golf Cart Painting Makes Sense
DIY paint jobs can look great, but professional services deliver higher-end results.
Professionals use:
- Automotive-grade paints
- HVLP spray systems
- Custom graphics and color matching
- Multi-layer clear coats
If you’re restoring a high-end cart or building a show-quality vehicle, professional painting may be worth it.
For example, services like custom golf cart paint and graphics in California can create factory-level finishes and unique designs.
These upgrades often make a cart stand out dramatically in resale listings.
Extra Tips for a Better Paint Job
Small details make a big difference.
Helpful tips:
- Paint in a dust-free environment
- Ideal temperature: 65–80°F
- Avoid high humidity
- Always test spray on scrap first
- Use multiple thin coats instead of heavy ones
Also remember: curing time matters. Rushing the process often leads to fingerprints, dents, or dull spots.
FAQ on Painting a Golf Cart
Both methods work. Spray paint cans are easier for beginners, while spray guns provide a smoother and more professional finish.
Yes. Primer improves adhesion and prevents peeling, especially on plastic or fiberglass panels.
Most DIY paint jobs take 2–3 days, including prep work, priming, painting, and curing time.
Most projects use 320–400 grit for general sanding and 600 grit before paint for a smoother finish.
Yes. Most golf carts have plastic bodies, but you need adhesion promoter or bonding primer for the paint to stick properly.
Costs vary:
DIY spray paint job: $60–$200
Spray gun DIY setup: $150–$400
Professional custom paint: $800–$3,000+
Final Thoughts
Repainting a golf cart can be a rewarding project that dramatically improves its appearance and resale value. With proper preparation, quality primer, and patience during the painting process, even a DIY job can produce impressive results.
If your goal is to create something truly unique—or maximize resale value—a professional customization shop can help deliver a flawless finish and custom graphics that really make the cart stand out.
Either way, taking the time to do the job right will make your cart look newer, cleaner, and much more appealing to future buyers.